Build Your Own Plywood Boat: A Beginner's Guide
Hey there, future boat builders! So you're thinking about building your own plywood boat? That's awesome! It might seem daunting, but trust me, with a little patience and these easy-to-follow plans, you can totally do it. This guide is perfect for hobbyists, students, or anyone who loves the smell of sawdust and the satisfaction of creating something amazing with their own two hands.Choosing Your Boat Design
The first step is picking the right boat for you. Don't jump into something crazy complicated right away! For beginners, a simple design is key. Think small and manageable. Here are a few suggestions:
- Small rowboat: A classic choice, relatively easy to build, and perfect for calm waters.
- Simple kayak: A bit more challenging, but still achievable for a beginner. Offers a great workout!
- Miniature sailboat: A fun project that introduces you to some basic sailing principles.
Once you've chosen your design, find some free or low-cost plans online. There are tons of resources available â€" just search for "free plywood boat plans for beginners". Make sure you carefully read through the plan before you even think about touching your tools!
Gathering Your Materials and Tools
You’ll need a few essential items. Don't worry, you probably have some of this stuff already!
Materials:
- Marine-grade plywood: This is crucial! Regular plywood will rot in the water.
- Epoxy resin and hardener: This is your waterproof glue and sealant.
- Wood screws (stainless steel): Rust is the enemy!
- Fiberglass cloth (optional): For added strength and waterproofing.
- Paint or varnish (marine-grade): To protect your beautiful creation.
Tools:
- Jigsaw or circular saw: For cutting the plywood.
- Drill with various bits: For pilot holes and screwing.
- Clamps: Lots and lots of clamps! You'll need these to hold the pieces together while the epoxy cures.
- Measuring tape and pencil: Accurate measurements are key.
- Sandpaper (various grits): For smoothing the surfaces.
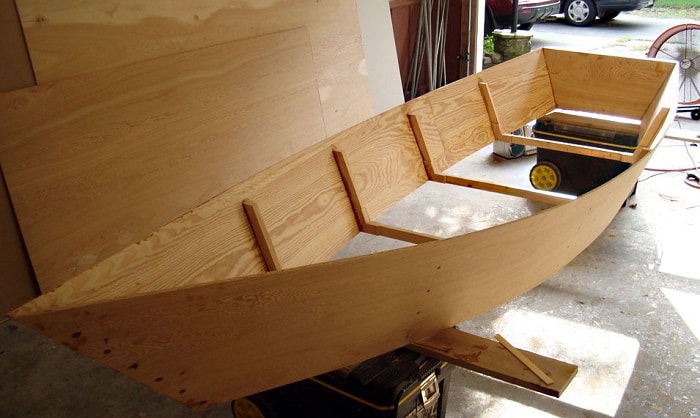
The Building Process: A Step-by-Step Guide
This is where the fun begins! Follow your chosen plans closely. The general steps usually include:
- Cutting the plywood pieces: Take your time and be precise.
- Assembling the hull: Use clamps to hold the pieces together while the epoxy cures. Follow the instructions carefully!
- Adding internal supports (frames): These add strength and rigidity.
- Fiberglassing (optional): Apply layers of fiberglass cloth to the exterior of the hull for extra strength and water resistance.
- Finishing and painting: Sand down any rough edges and apply your chosen paint or varnish.
Remember, patience is key. Don't rush the process. Take your time, enjoy the journey, and celebrate the small victories along the way.
Safety First!
Always wear safety glasses when using power tools. Epoxy resin can be irritating to the skin, so wear gloves and work in a well-ventilated area. Read the safety instructions for all materials and tools before you begin.
Frequently Asked Questions
Q: How long does it take to build a plywood boat?
A: This depends on the boat's complexity and your experience level. It could take anywhere from a few weekends to several months.
Q: How much does it cost to build a plywood boat?
A: The cost will vary depending on the size and materials used. You can build a small boat for a few hundred dollars, but larger, more complex projects can cost significantly more.
Q: Do I need any special skills?
A: Basic woodworking skills are helpful, but not essential. A willingness to learn and follow instructions carefully is more important.
Q: Where can I find plans?
A: Search online for "free plywood boat plans for beginners". You can also find plans in books and magazines dedicated to boat building.
Happy building!
0 comments:
Post a Comment