Building a Wooden Canoe from Scratch: A Comprehensive Guide
Constructing a wooden canoe is a rewarding and challenging endeavor, requiring meticulous attention to detail, patience, and a passion for woodworking. This comprehensive guide will provide you with the necessary plans, tips, and techniques to build a beautiful and functional canoe from scratch.
Choosing Your Canoe Design
The first step in building a wooden canoe is selecting a design that suits your needs and skill level. Numerous canoe plans are available online, in books, and from specialized suppliers. Consider the following factors when making your choice:
Canoe Type
- Traditional Canoes: Often made of cedar or spruce, these canoes typically have a graceful, rounded hull and are known for their smooth paddling.
- Outrigger Canoes: Featuring a stabilizing float attached to the hull, these canoes are excellent for stability and open water paddling.
- Kevlar or Carbon Fiber Canoes: These canoes are incredibly lightweight and durable, making them ideal for high-performance paddling.
Length and Width
The length and width of a canoe determine its carrying capacity, stability, and speed. Longer canoes generally offer more storage space and better tracking, while wider canoes provide greater stability.
Skill Level
Beginners may want to start with a simpler design, such as a stitch-and-glue canoe, which uses pre-cut plywood panels and requires less traditional woodworking skills. More experienced builders can tackle complex designs with curved ribs and planking.
Gathering Materials and Tools
Once you've chosen your canoe design, you'll need to gather the necessary materials and tools. Here's a comprehensive list:
Wood
- Planking: Use a durable, rot-resistant wood like cedar, spruce, or mahogany for the canoe's outer shell.
- Ribs: Select a strong, flexible wood for the ribs, such as oak, ash, or hickory.
- Stems: The stems are the curved pieces that form the bow and stern of the canoe. You can use the same wood as the planking or a stronger wood like oak or ash.
- Keel: The keel is the central spine of the canoe. Choose a hardwood like oak or ash for its strength and durability.
Other Materials
- Epoxy Resin: Use epoxy to seal the wood and create a watertight hull.
- Fiberglass Cloth: Apply fiberglass cloth over the epoxy to create a durable and waterproof barrier.
- Wood Filler: Use wood filler to repair any gaps or imperfections in the wood.
- Paint: Select a marine-grade paint for the canoe's finish.
- Hardware: This includes canoe seats, gunwales, thwarts, and any other desired accessories.
Tools
- Table Saw: Used for cutting planking and ribs.
- Band Saw: Used for cutting curved shapes, especially the stems.
- Router: Used for smoothing and shaping wood.
- Drill: Used for drilling holes for fasteners and hardware.
- Clamps: Used to secure wood during assembly.
- Sandpaper: Used to smooth the wood and prepare it for finishing.
- Brushes and Rollers: Used for applying epoxy resin, fiberglass cloth, and paint.
Building the Canoe Frame
Once you've gathered your materials and tools, you can begin building the canoe frame. This is a crucial step that forms the foundation of your canoe.
Preparing the Ribs
Cut the ribs to the specified length and shape according to your canoe plans. Use a band saw or a hand saw to create the curves.
Constructing the Stems
Carefully shape the stems using a band saw or hand saw. The stems should be curved to match the canoe's bow and stern.
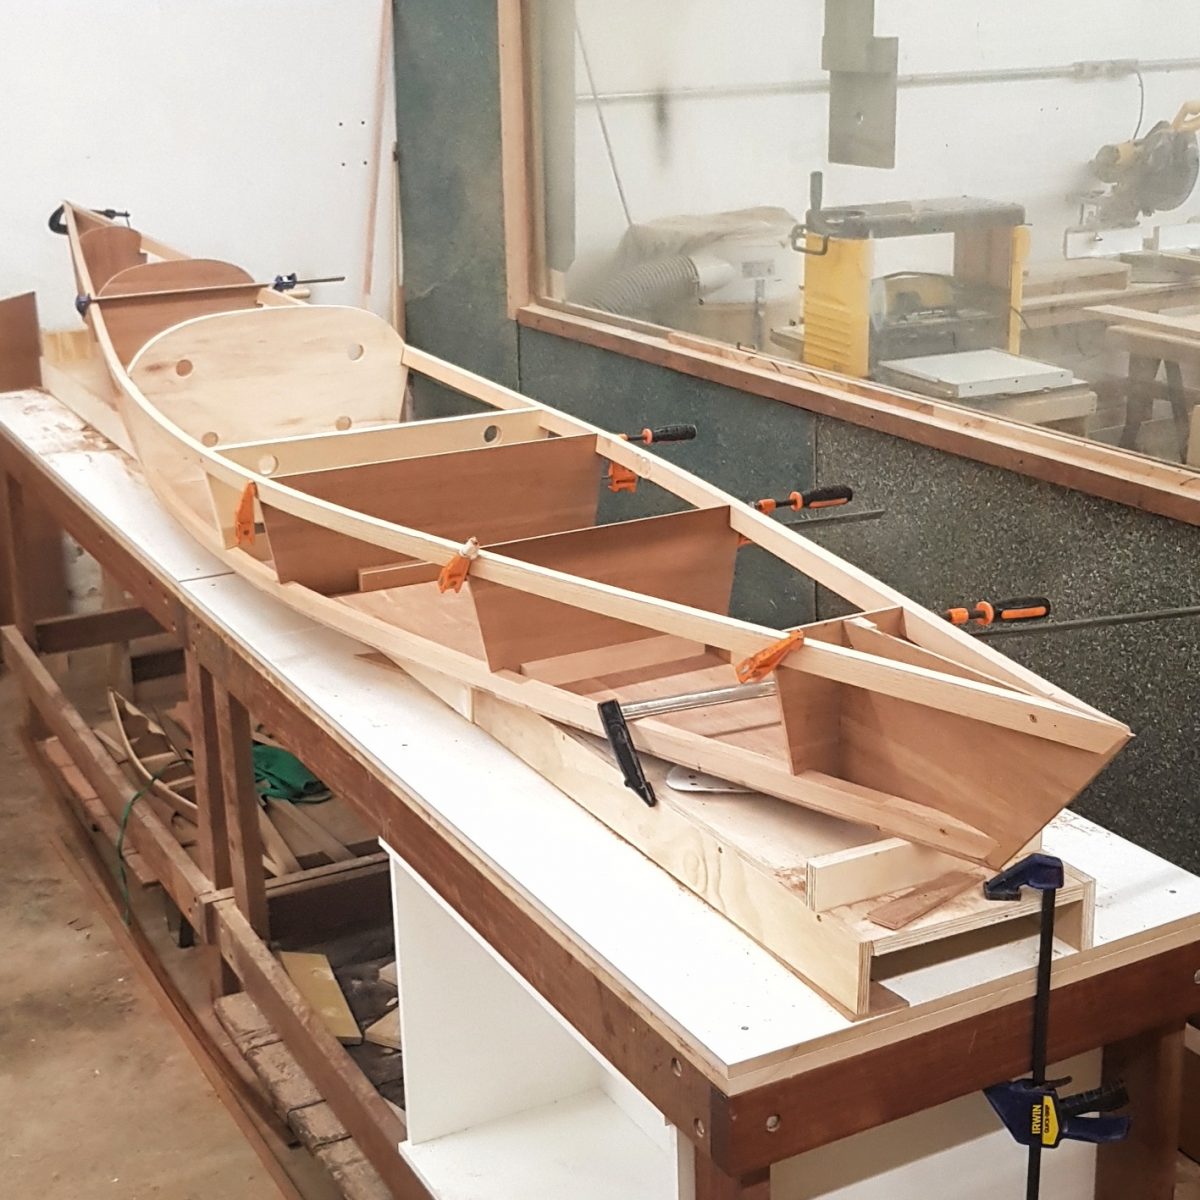
Assembling the Frame
Lay out the keel and ribs on a flat surface, ensuring they are evenly spaced according to your plans. Use epoxy and screws to attach the ribs to the keel.
Adding the Stems
Attach the stems to the ends of the keel and ribs, using epoxy and screws. Make sure the stems are securely fastened and properly aligned.
Planking the Canoe
Planking is the process of attaching the outer shell of the canoe to the frame. This requires careful attention to detail and precise woodworking skills.
Preparing the Planking
Cut the planking boards to the specified length and width according to your plans. Use a table saw or a hand saw to make clean, accurate cuts.
Attaching the Planking
Begin by attaching the planking boards to the keel and stems. Use epoxy and screws to secure the planking, ensuring the boards are tightly joined and flush with the frame. You may need to use a clamp to hold the boards in place while the epoxy dries.Creating the Canoe Shape
As you attach the planking, gradually bend the boards to conform to the shape of the canoe. This is a critical step that requires patience and careful manipulation of the wood. You may need to use a heat gun or steamer to soften the wood and make it more pliable.
Finishing the Canoe
Once the planking is complete, you'll need to finish the canoe to create a durable and waterproof hull.
Sanding and Filling
Sand the canoe's surface thoroughly to create a smooth finish. Use sandpaper of different grits, starting with a coarse grit to remove imperfections and gradually progressing to a finer grit for a smooth finish. Fill any gaps or cracks with wood filler and sand smooth.
Applying Epoxy Resin
Apply multiple coats of epoxy resin to seal the wood and create a watertight barrier. Allow each coat to dry completely before applying the next.
Adding Fiberglass Cloth
Apply fiberglass cloth over the epoxy to strengthen and waterproof the hull. Use a brush or roller to apply resin to the fiberglass cloth, ensuring it's completely saturated. Allow the fiberglass to cure completely before sanding smooth.
Painting the Canoe
Apply a marine-grade paint to the canoe's surface to protect it from the elements. Select a color that suits your style and preferences. Allow the paint to dry completely before adding hardware.
Adding Hardware and Accessories
The final step in building your wooden canoe is to add hardware and accessories. This includes installing seats, gunwales, thwarts, and any other desired features.
Installing Seats
Secure the canoe seats to the canoe's frame using screws and epoxy.
Adding Gunwales
The gunwales are the protective strips that run along the top of the canoe's sides. Attach the gunwales to the canoe's frame using screws and epoxy.
Attaching Thwarts
Thwarts are the crosspieces that help support the canoe's frame and provide additional support for the paddlers. Secure the thwarts to the canoe's frame using screws and epoxy.
Launching Your Wooden Canoe
Once your wooden canoe is fully built and finished, you can finally launch it into the water. Take your time and enjoy the fruits of your labor.
Maintenance Tips
Proper maintenance is essential to keep your wooden canoe in good condition for years to come. Here are some tips:
- Regular Cleaning: Wash the canoe with soap and water after each use to remove dirt and debris.
- Storage: Store the canoe in a dry, well-ventilated area to prevent moisture buildup.
- Inspecting: Regularly inspect the canoe for any signs of damage or wear and tear.
- Repairing: Repair any damage promptly using epoxy, fiberglass cloth, and wood filler.
Building a wooden canoe is a labor of love that requires dedication, patience, and meticulous attention to detail. By following these steps and tips, you can create a beautiful and functional canoe that will provide you with years of enjoyment on the water.
0 comments:
Post a Comment